If you only have two minutes: send a vector file (PDF, AI, or SVG) or a PNG with a transparent background at 300 dpi, at final size. On a t-shirt, the chest fits up to 16 × 16 cm and the back up to 32 × 36 cm. If your art has too many colors to embroider, go with printing; if it's six flat colors, embroidery works better. And before you order twenty, make one. The rest of the article explains why.
This article is for those who already have the art done. Illustrators, designers, painters, tattoo artists, people who draw for themselves and at some point think: this would look great on a t-shirt. After that, the next question is usually always the same, and it's the hardest one to answer on your own: does my image work?
At Matter Studio we print and embroider pieces every day, many of them from original artwork. This guide is what we tell people who write to us with a file and a question. No selling, no promises of magic, and we also say what doesn't work.
Your art wasn't made with fabric in mind
An illustration designed for screens lives with light shining from behind and infinite detail. A painting on paper has a perfect white around it. Fabric has none of that: it's opaque, has its own color, has texture, folds, stretches, and goes through the washing machine.
However, this isn't a problem, it's just a translation. In fact, the most common mistake isn't having bad art, it's submitting excellent art without adapting it. Before anything technical, ask your work three questions:
- Does it work from ten feet away? No one looks at a t-shirt up close.
- What's lost if you remove half the detail? If the answer is "nothing," remove it.
- Does it survive without the background? A lot of illustration depends on the white background of the paper, and that background is going to disappear.
The 30-centimeter test
This is the cheapest test out there, and almost nobody does it. Print your art on paper at actual size the one that's going to be printed, cut it out and tape it onto something you already own. Put it on. Look in the mirror from six or ten feet away.
In ninety seconds, you'll notice things no mockup can tell you: that the thin line disappeared, that the text isn't legible, that it's too big, that it would look better higher up. To get the scale right, here are the sizes we work with:
- Center chest or left chest: up to 16 × 16 cm on a t-shirt
- Full front: up to 28 × 28 cm
- Full back: up to 32 × 36 cm
- Embroidered on cap: up to 10 × 8 cm
An A4 sheet is 21 × 29,7 cm. If you can picture your art fitting inside an A4 on the chest, you already have a sense of what a full front looks like.
What survives printing and what gets lost
Here at home we print using DTF, meaning we print in full color over a white base layer applied underneath. In practice, that means colors hold up even on dark fabric, which is great news if you work with saturated color. But there are limits, and it's best to know them before you fall in love with what you see on screen.
Thin lines
Lines thinner than about half a millimeter at final scale become fragile: they can print unevenly or close up entirely. So if your illustration is made up of linework fine, you have two options: increase the overall size of the artwork, or thicken the lines on purpose in the print version. An illustration for printing on A5 paper can rarely go as-is to 28 cm without gaining stroke weight.
Gradients and smooth transitions
On the other hand, long gradients that fade to transparent are the weak point of any transfer. What looks like a smooth transition on screen usually comes out on fabric with a visible step or a dirty edge where the ink stops existing.
Two solutions that actually work: convert the fade into a dot pattern (halftone), which has history in printing and gives an intentional result instead of an accidental one; or end the gradient in a solid color instead of letting it dissolve into nothing.
Watercolor, grain, and scanned painting
Hand-painted work, on the other hand, prints really well, though with one caveat: when you scan a painting, the paper's "white" isn't actually white. It's a very slight gray, and since printing sits on a white base, that gray shows up as a ghost rectangle around your art.
So, scan at 600 dpi, clean the background until it's truly transparent, and check it closely. If your painting has watercolor stains that fade at the edges, decide what you want: either accept the cutoff, or let the stain end at some density.
White pretending to be transparent
Likewise, if your art has white elements that only read as such because the file's background is white, on a black garment they'll stay white, and the composition changes completely. It's worth opening the illustration over a background in the garment's color before deciding.
The white halo: the mistake that ruins illustrations the most
This deserves its own section because it's invisible on screen and obvious on the garment. When you remove a background, you almost always end up with semi-transparent pixels at the edge, ones with 10% or 30% opacity that soften the outline. On your monitor, that's a nice-looking outline. In printing, the white base gets applied underneath any pixel that exists, even if barely visible, and the result is a whitish, dirty halo outlining your entire illustration.
Fortunately, the fix is simple once you know it: force every pixel to be either fully present or fully absent. In Photoshop you can do this through the alpha channel with levels or threshold, and most programs have a defringe or halo-removal option. A 1 pixel outline in the artwork's own color also seals the edge nicely.
Above all, save as a PNG with transparent background, never JPG. A JPG doesn't save transparency and always brings a white background, which will get printed as a solid rectangle.
Color: the screen lies, and it always lies for the better
Your monitor emits light. Ink reflects it. No screen can show you exactly what will come out, and the difference is biggest precisely in the colors illustrators love most.
- Neons and fluorescents don't exist in ink. An electric lime green on screen always comes out calmer. It's not a flaw, it's physics.
- The garment color factors in. Even with a white base, a light color applied over dark fabric reads differently than the same color over natural or white.
- If you're going to sell the same art in five garment colors, look at all five. A palette that sings on white can disappear on beige.
Lastly, if your brand has an exact color that's non-negotiable, tell us beforehand. It's better to talk through the closest possible match than to receive a piece and be disappointed by a blue that came out half a shade darker.
Resolution, no myths
The rule that gets thrown around is “300 dpi.” The rule is good, but it's incomplete, because dpi alone doesn't mean anything: it only makes sense relative to the size you're going to print at.
In practical terms, here's the math: divide the pixels by the width in centimeters and multiply by 2,54. An image that's 3300 pixels wide printed at 28 cm gives about 300 dpi, which is ideal. The same image at 28 cm with only 800 pixels gives 72 dpi, which is what you see when someone zooms into an image pulled from Instagram.
- Vector (PDF, AI, SVG): has no resolution, it scales up as far as you want. It's always the best option when it's available.
- Image (PNG, JPG, WEBP): aim for 300 dpi at final size, 150. and up works well
- Below 70 dpi our customizer gives you a heads-up while you're putting the piece together. It's a warning, not a block: you can keep going, but the decision is now yours, and an informed one.
If you want the step-by-step technical guide for exporting, we have a whole guide just on that: how to prepare your file for customizing clothing. We accept files up to 20 MB in JPG, PNG, SVG, WEBP, PDF, and AI formats. If your original is huge, export a version at final size instead of sending the whole working file.
Can your illustration handle being embroidered?
We've already written a whole article comparing the two techniques, covering durability, costs, and use cases: DTF or embroidery, which is the best technique. Here we only care about one question, and it's yours: what happens to your illustration once it goes through the embroidery line?
Embroidery isn't printing with a different finish, it's a different language. Thread has physical thickness, and that changes everything you can design.
Embroiders well: monograms, solid-line logos, bold lettering, illustrations reduced to closed shapes, simple symbols. It gains texture, relief, and a finished-piece feel that printing doesn't give.
Doesn't embroider well: gradients, watercolor, portraits, shading, anything that relies on transitions. And very small detail: a line under about 1 mm disappears or breaks, and letters shorter than 6 mm tall become unreadable.
In practice, embroidering an illustration means reducing it to six solid colors, which is the limit we work with. If you can't picture your art in six flat colors without losing its soul, go with printing.
Embroidery requires a digitizing file, which is the work of converting your design into stitches. It's 15 € for each different design, paid once and not per piece: embroidering one piece or thirty with the same design uses the same matrix, but each new design needs its own. The areas go up to 20 × 20 cm on hoodies and sweatshirts, and up to 10 × 8 cm on caps.
Make one piece first. Always.
It's the most useful advice in this whole article, and the one that saves the most money for anyone just starting out.
Since we have no minimums, you can order exactly one piece. Do that. Wear it for a week, wash it three times, photograph it in natural light. This way you'll learn if the size was right, if you like the color in real life, if that detail you were worried about is actually noticeable. Only then does it make sense to think about quantities.
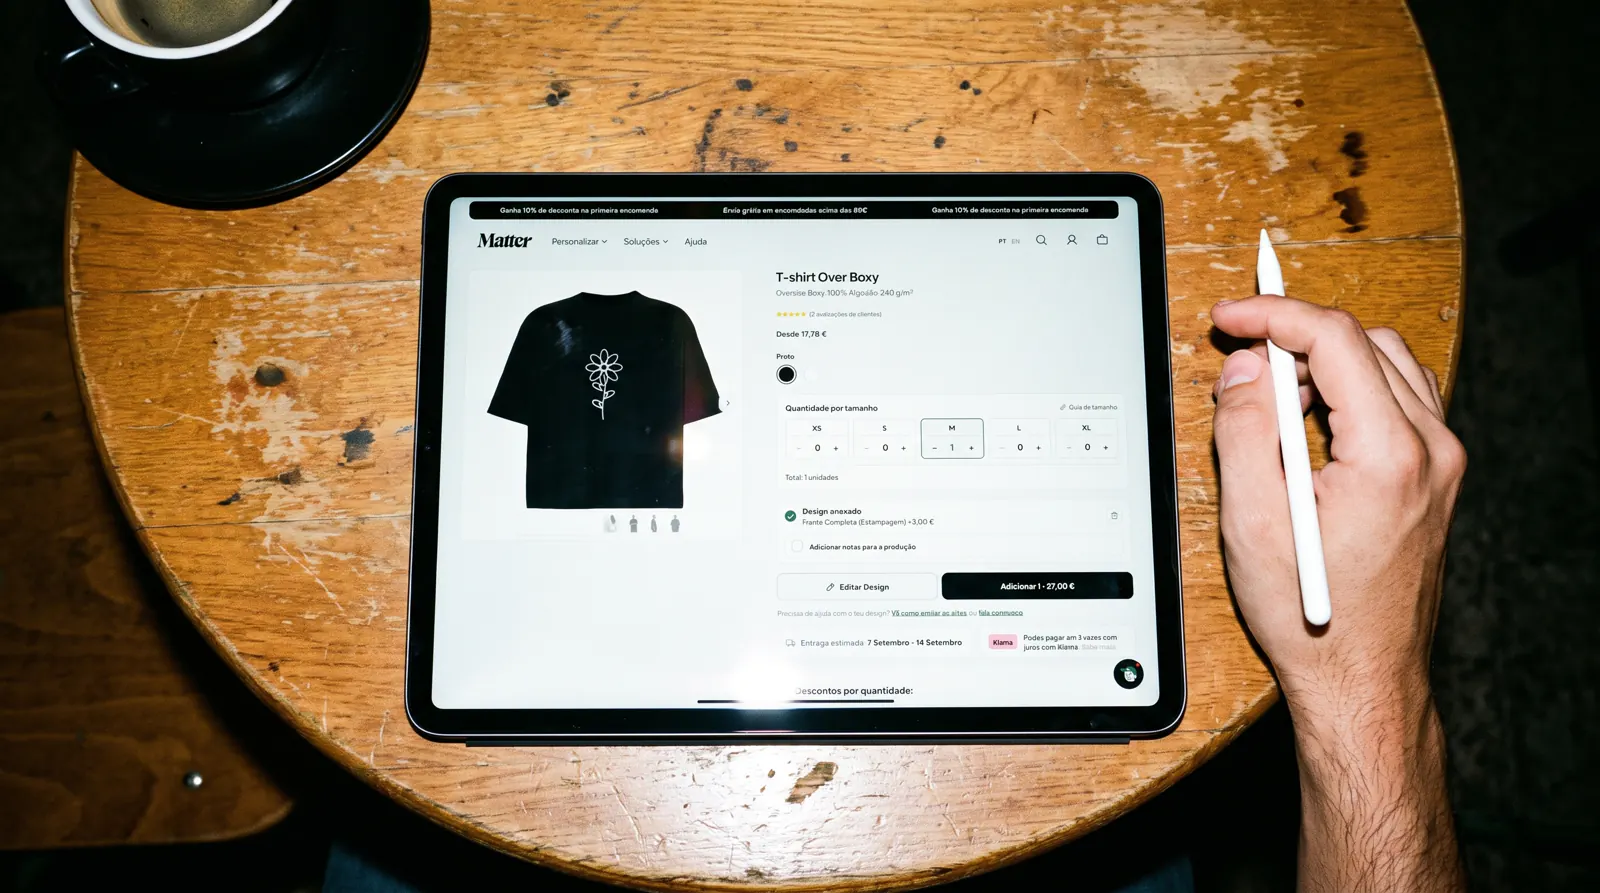
Also, when you start thinking about quantities, the price breaks help: from 8 units the price per piece drops 10%, from 20 it drops 20%, from 30 it drops 26%. You don't need to decide everything today.
In the meantime, an honest note about lead times: we don't keep stock sitting around. Materials are ordered for each job, so expect a few days before production starts. Orders above 40 pieces take a bit longer, and above 50 a little more still. If you have a date (a fair, a launch, an exhibition), let us know right away and we'll plan around it.
Rights: the part nobody likes to read
We're not lawyers and this isn't legal advice, but there are three things really worth keeping in mind.
Your art is yours. Sending us a file to print doesn't give us any rights over it. We produce what you ask for, and the work stays yours.
Fonts have licenses. A font you downloaded for free might be free for personal use and paid for commercial use. If you're going to sell pieces with lettering, check the license first (the Adobe Fonts licensing page explains the differences between license types well). It's a small detail that causes big problems.
AI-generated images and third-party work. If you use an AI tool, read that tool's terms on commercial use, because they vary a lot and the legal framework is still settling. And the obvious: other people's characters, logos, and works don't get printed to sell, no matter how good the piece looks.
How to price your art
When it comes to pricing, a lot of artists look at what others charge. That's the fastest way to end up working for free, because someone else's cost structure isn't yours.
Work the math backwards, starting with what comes out of your own pocket: the actual cost of the produced piece (which you can see updating as you build the design in the customizer), the embroidery matrix if it's embroidered, shipping, packaging, and the percentage the platform takes if you sell online. What's left over is your margin, and that's what pays for the hours you spent designing.
Two details that affect the cost more than they seem to: the embroidery matrix is paid once per design, so it gets diluted if you produce more pieces with the same design. And the quantity tiers affect the unit cost, which means the same piece can have very different margins depending on how you group production.
In short, if your art is original and has a following, don't be afraid to charge for it. Someone buying a piece from an illustrator isn't comparing prices to a plain supermarket t-shirt, they're buying your work.
Checklist before you send us the file
- Vector whenever available (PDF, AI, or SVG). If not, PNG at 300 dpi at final size.
- Truly transparent background, no semi-transparent pixels at the edges.
- Text converted to outlines, so no font gets lost along the way.
- Art already at the real size it will be printed at.
- Thin lines thickened for the final scale.
- Gradients that end in a solid color or converted to a raster.
- File viewed against the garment color, not against white.
- For embroidery: six solid colors, no gradients, letters above 6 mm.
- Paper test, at actual size, held up to a piece.
- File under 20 MB.
Frequently Asked Questions
About the file
What resolution does artwork need to be printed?
The ideal is 300 dpi at final print size, and anything from 150 dpi up works well. A vector file (PDF, AI, or SVG) has no resolution and always works. Matter Studio's customizer automatically shows a warning if the image falls below 70 dpi at the size you've chosen.
Do I need to convert my artwork to CMYK?
No. Send it in RGB, which is the mode you work in and preserves the most color. Conversion to ink happens in our print workflow. What's really worth knowing is that neons and fluorescents don't exist in ink and will always come out more muted than on screen.
About sizes, techniques, and quantities
What's the maximum size for a t-shirt print?
At Matter Studio, center chest and left chest go up to 16 × 16 cm, full front up to 28 × 28 cm, and full back up to 32 × 36 cm. For reference, an A4 sheet measures 21 × 29,7 cm.
How much does the embroidery matrix cost?
The matrix costs 15 € for each different design and is paid once, not per piece (12 € for pouches and corduroy bags; 15 € for tote bags). Embroidering one piece or thirty with the same design uses the same matrix, so the cost gets diluted the more pieces you produce at once.
Is there a minimum quantity to print my artwork?
There's no minimum. You can order a single piece, which is the best way to test before investing. From 8 units the price per piece drops 10%, from 20 it drops 20%, and from 30 it drops 26%.
About rights
Can I sell pieces using a font I downloaded for free?
It depends on the font's license. Many free fonts are free for personal use but require a paid license for commercial use, which includes selling clothing. Always check the license before launching a collection with lettering.
Can I print images generated by artificial intelligence?
Technically yes, but read the terms of the tool you used regarding commercial use, since they vary quite a bit. There's also the issue that AI-generated works may not be protected by copyright in various jurisdictions, which means you might not be able to stop someone else from using the same image.
What if the file isn't perfect?
Finally, it's worth mentioning that we check every file before production. If we spot something that won't turn out well, for example resolution that's too low for the requested size or a halo around the edges, we'll let you know before printing anything. We'd rather send an extra email than a piece that disappoints you.
If you'd like to try it out, the customizer lets you upload your artwork, choose the area, watch the price change in real time, and save the design to come back to later. You don't need to order anything to play around with it.
And if you want to dig deeper, we have two articles that follow up on this one: how to prepare your file for customizing clothing, more technical and step-by-step, and how to create merch from scratch, for anyone thinking about the whole project and not just the artwork. If you're deciding on the type of piece, the guide to t-shirt cuts helps you figure out which silhouette suits your artwork best.